
Progress Report: Kitchen Garden Rock Wall {Part 2}
Last we left you, our new to-be kitchen garden was looking like this.

A nice big space cleared of all the weeds and debri.
Noticeably absent: any sort of retaining wall to hold that raised garden in place. That's because we were toying with the idea of expanding the overall size (note the black rope) and investigating other options for the retaining wall.
Option 1: Reusing the old railroad ties. But, unfortunately they didn't fit the new dimensions of the garden.
Option 2: Purchasing new railroad ties, which as it turns out are kind of hard to find. Both Lowes and HomeDepot had similar options that were fairly cost effective.

But, in the end, we both knew we wanted to go with Option 3: Natural stone.
A dry stack stone wall was something we had planned for our Chicago yard (remember this inspiration post?) , but the unexpected move to the Charlotte put a damper on that one. So why not reprise that vision for our new kitchen garden.
A quick internet search led us to this company just outside Charlotte. We packed the girls up and headed out on an adventure…or at least that's how we sold it to them.

We quickly settled on a gray toned stone called Eagle Mountain. The new wall will be approximately 45 ft long and about 10 inches high which translates to about 1.5 tons of stone. That's a lot of stone and a big investment, but hopefully will make an equally big statement in the backyard. That we love for a very long time.
We also ordered: 3 yards of filler dirt and 1 yard of black gold (compost) to backfill the garden. And 3 yards of crush & run (base for walkways) and 3 yards of crushed stone to create the walkways within the garden.
With all the major purchases behind us and deliveries filling the driveway, it's time to get working. This past weekend, we spent a couple of hours getting started.
Here's our plan,
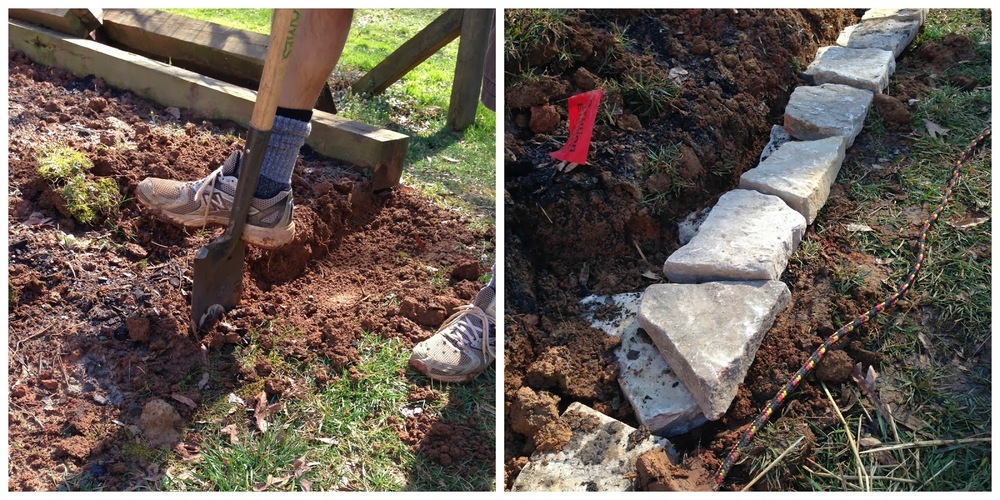
Step 1: dig a trench 3-5 inches deep depending on height of wall.
Step 2: place rocks, edge to edge in the trench, leveling as you go. Bigger, wider rocks at the bottom moving up to smaller rocks near the top.
Step 3: Backfill dirt to the edge of the wall.
Step 4: Fill any large spaces between rocks with crush & run between layers.

Here's a peak at one of the areas where we have added the crush & run to provide extra support between the rocks and layers.

After 3 hours work, this is where we stand. Two layers, but only some areas are sporting the additional crush & run. Lots of work still to do, but a good start. Planting goal is mid April. More to come.
until next time,